


StellarMate
Can I pay without having a Paypal account?
Yes, you can pay directly with a Debit or Credit card. When redirecting from StellarMate website to Paypal, select Guest Checkout.
Where do I download StellarMate OS?
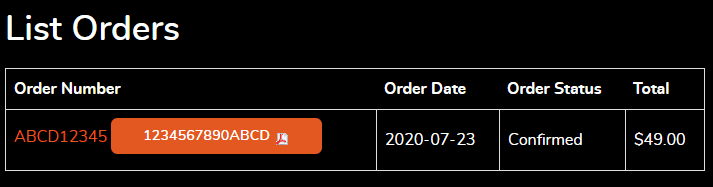
After you purchased StellarMate OS, you should receive a confirmation email with links to the downloads. In the future, if you want to download StellarMate OS again, make sure you are logged in to the stellarmate.com website and then go to the Orders page.
You should see a list of your orders. Click on your order link, then scroll down to see the downloads. Make sure to download the SM OS version appropiate for your hardware platform.
In case you have an issue with flashing the image with Raspberry PI imager, please follow these steps:
- Using the Raspberry Pi Imager install Misc Utility Images -> Bootloader -> SD Card Boot.
- Move card to RP and boot, power off, removed card.
- Erase card using Raspberry Pi Imager, remove card from computer and insert again.
- Using Raspberry Pi Imager install the StellarMate image.
Is Wayland supported?
Wayland display protocol is currently not supported in StellarMate OS due to issue with VNC support. Please ignore any requests to switch to Wayland in Raspberry PI OS and stick with X11 until StellarMate OS officially supports Wayland out of the box.
Can I use SD Card for Raspberry PI 4 for Raspberry PI 5?
Yes, the same SD card can be used and swapped at any time between Raspberry PI 4 & 5.
How to change the monitor resolution? Open
You can change the Screen configuration by following the steps below:
- Click on the Start Menu
- Select Preferences --> Screen configuration
You can also check the Video below:
Connection to serial devices fail with a message that another driver is using the port?
This may happen when more than one INDI driver is trying to open the same serial port leading to a deadlock. When a new equipment profile is first started, and there are more than one serial port detected on the system, then the Port Selector window should popup up (on both Ekos and StellarMate App). In this step, you need to select the appropiate serial port for each device. Once done, press Connect All. Skipping this step would cause all drivers to trying establishing communication by iterating over all detedted serial port, and this may lead to a deadlock as indicated before.
There are two approaches to resolve this issue:
- In Ekos, edit your Equipment Profile and make sure Port Selector is checked and save the profile.
- In StellarMate App, delete and re-create the equipment profile.
Next time you start the profile, the Port Selector should come up again.
How to access Ekos Guide Logs? Open
Ekos Guide Logs are in PHD2-compatible format and are located in "~/.local/share/kstars/guideLogs".
You can use PHD2LogViewer to view the analysis.
Is Raspberry PI 5 supported?
Why can't my GPS dongle get a fix?
There are a few reasons for failing to get a 3D FIX from your GPS dongles.
- Indoor obstructions. Test with GPS outside with clear access to the sky so that it can communicate with the satellites.
- USB3 Interferance: If the GPS antenna is is connected close to an active USB3 port (a USB3 port connected to a device like a camera), then the interferance may lead to failure in obtaining a fix. It's recommended to get a GPS dongle with a long wire away from StelarMate to protect against unwanted interferance.
- Incorrect baud rate: Some older GPS dongle uses a baud rate of 4800. The default baud rate in StellarMate is configured as 9600. Therefore, StellarMate would fail to communicate with the GPS dongle unless the rate is changed within StellarMate to match the GPS dongle rate.
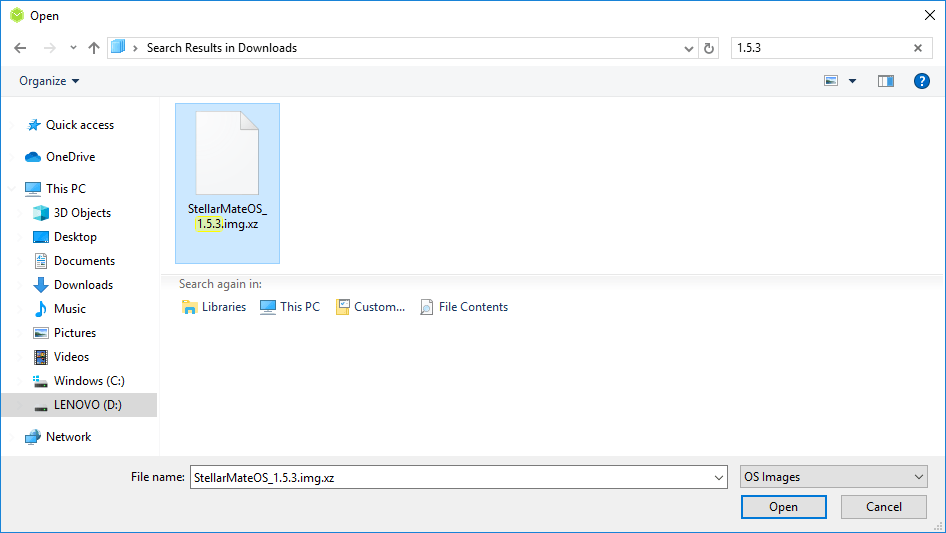
How to install StellarMate OS on a another MicroSD?
If you have purchased StellarMate from a retailer, please submit a new ticket and attach your order receipt and tell us if you don't see an order in the Orders page.
To be able to use a different MicroSD than the already built-in one, you need to flash StellarMate OS onto your MicroSD.
1. Login to the stellarmate.com website and then go to the Orders page.
2. You should see a list of your orders. Click on your order link, then scroll down to see the downloads. Make sure to download the SM OS version appropiate for your hardware platform.
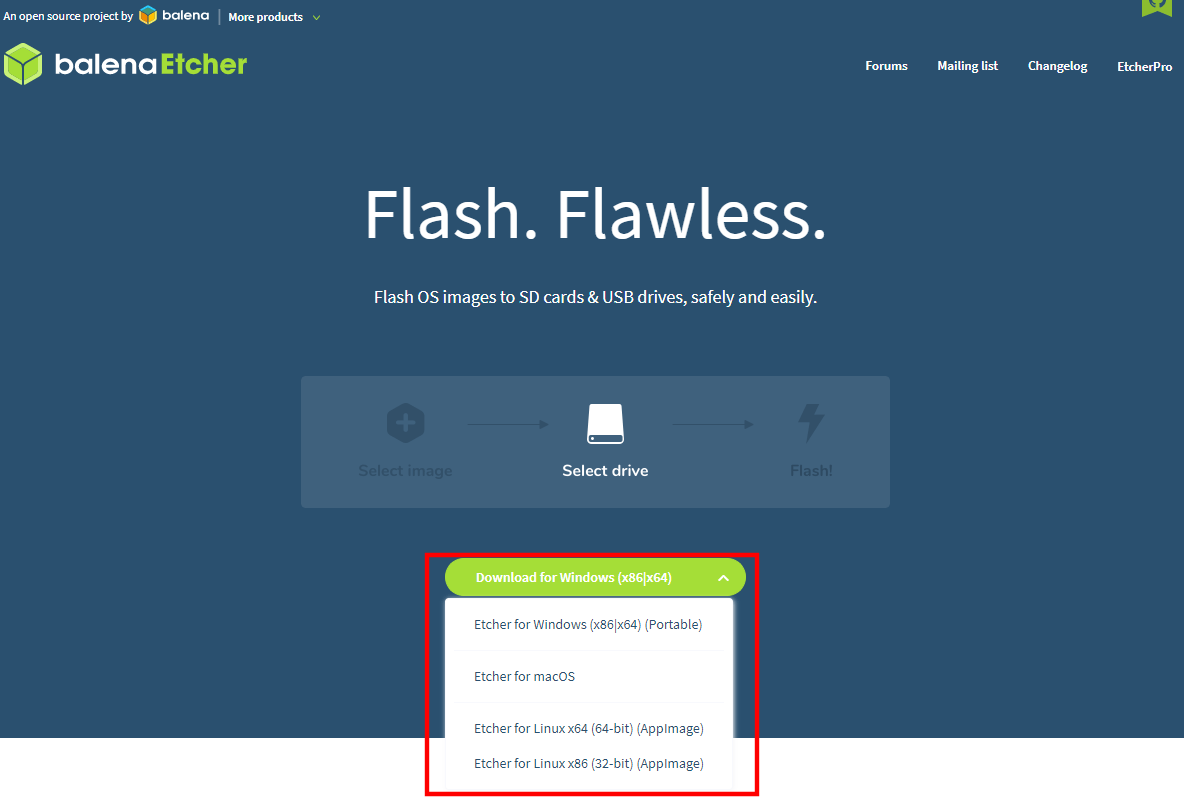
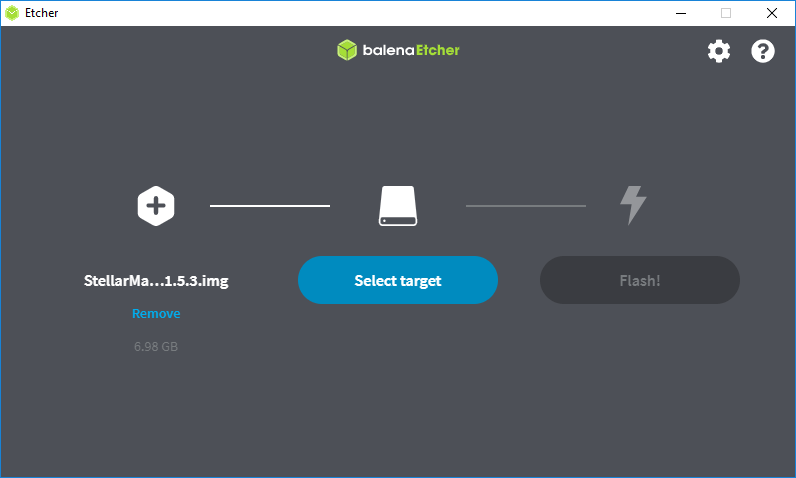
3. Download balenaEtcher, and install it, then open it.
4. Connect an SD card reader to your computer with the MicroSD card inside.
5. Open Etcher and select from your hard drive the StellarMate OS .xz file you just downloaded to write it to the MicroSD card.
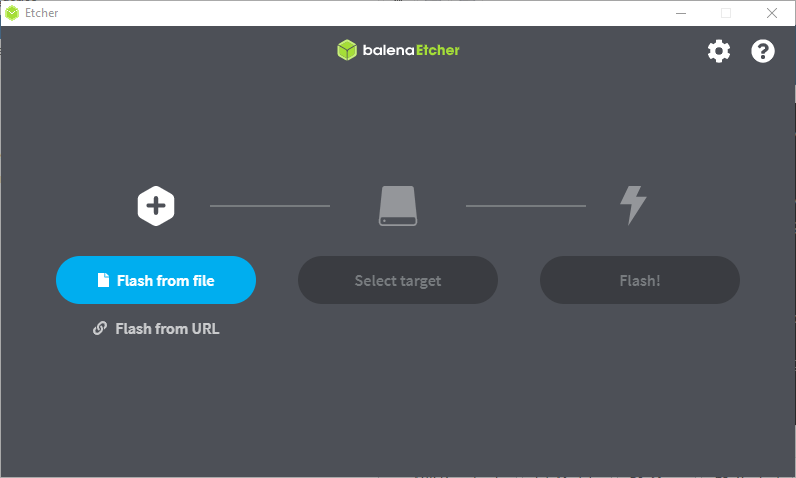
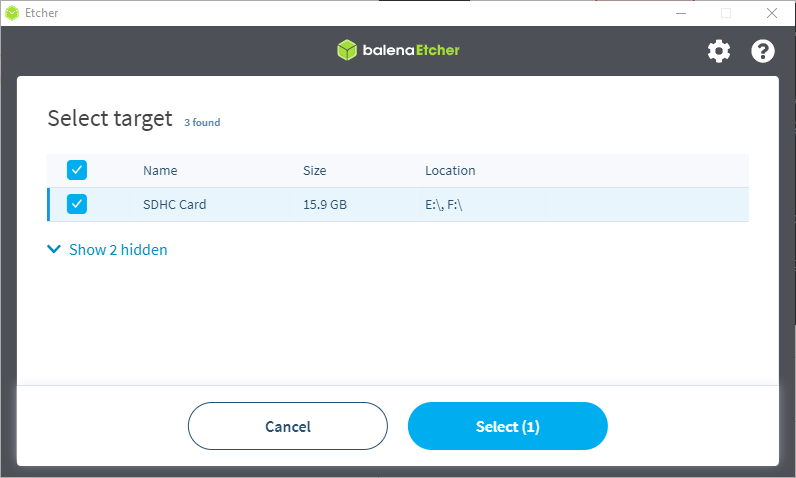
6. Select the MicroSD card you wish to write your image to.
7. Review your selections and click 'Flash!' to begin writing data to the SD card.
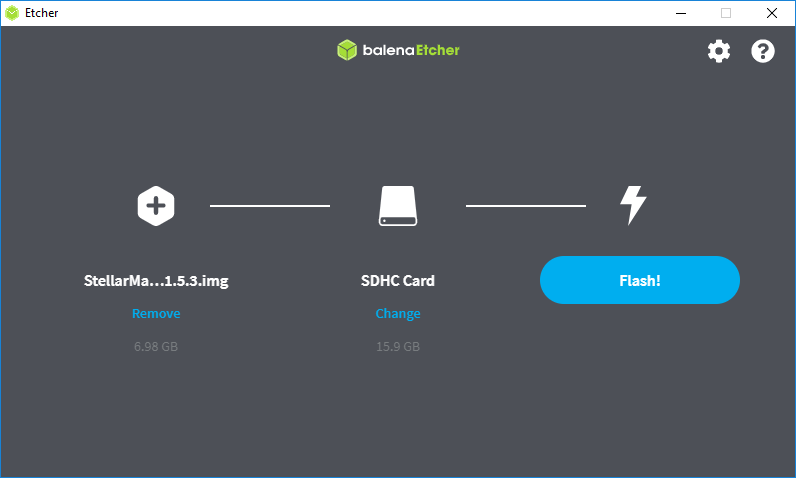
8. When it's done, connect the MicroSD to StellarMate and power it up!
Can I hook up an external USB drive for storing images and videos?
Absolutely. After you connect the external USB drive, use SM App to connect to StellarMate and start an equipment profile.
Then go to Capture module and File Settings
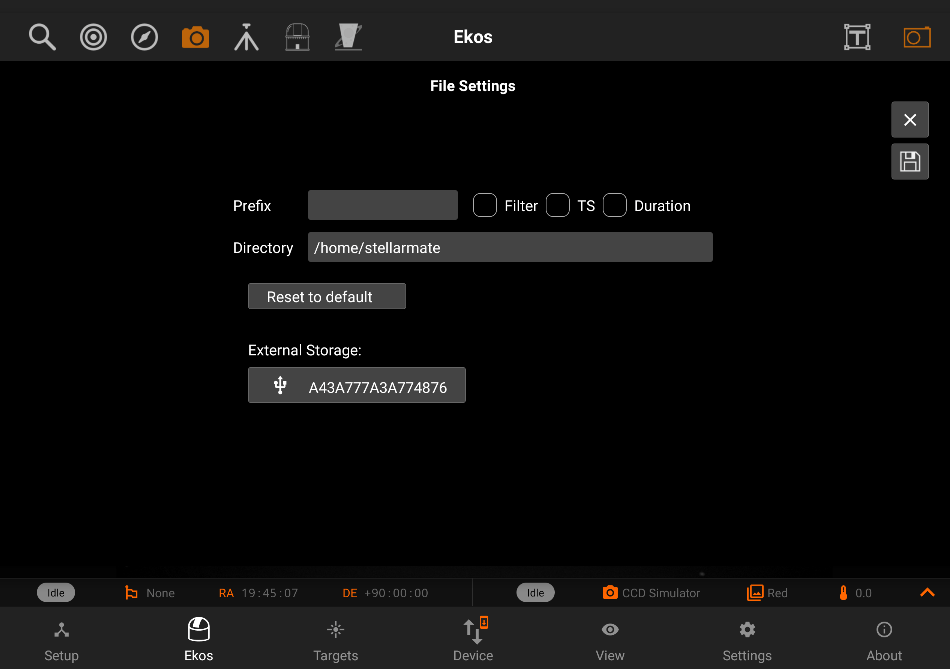
Tap the external storage name and it would be set as the default location for the Pictures directory. Restart StellarMate for the change to take effect.
If the USB storage is not detected by StellarMate, it will fall back to the default /home/stellarmate/Pictures directory
1. Using KStars on StellarMate
if you are running KStars inside StellarMate directly, then simply browse the location in the Directory filed of the Capture Module. You can also paste the URL there directly.
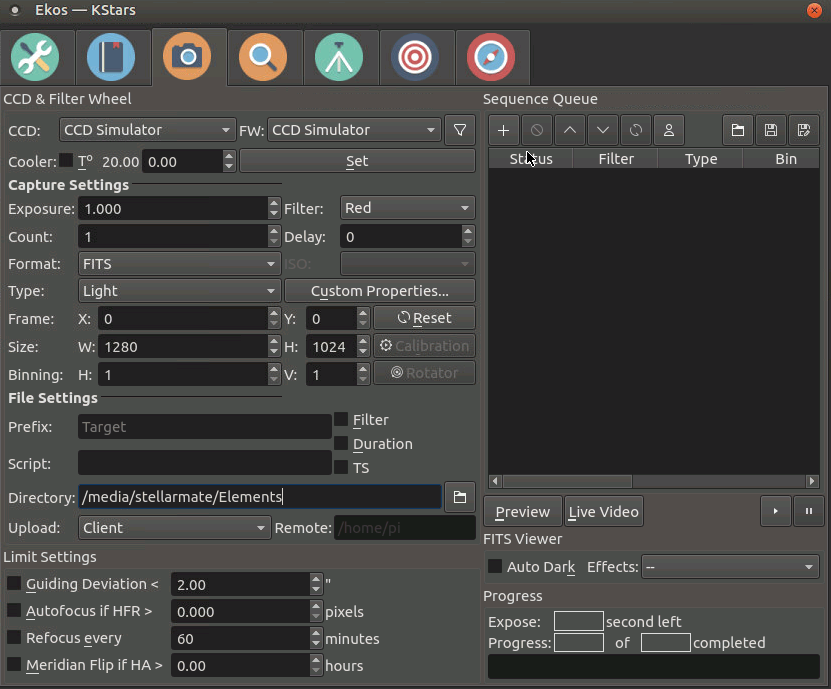
2. Using KStars on Windows/MacOS/Linux
If you are running KStars remotely on a Windows/MacOS or Linux machine, then in this case you need to change the Upload mode to either Local (save images only in StellarMate) or Both (save images in StellarMate and send a copy to us).
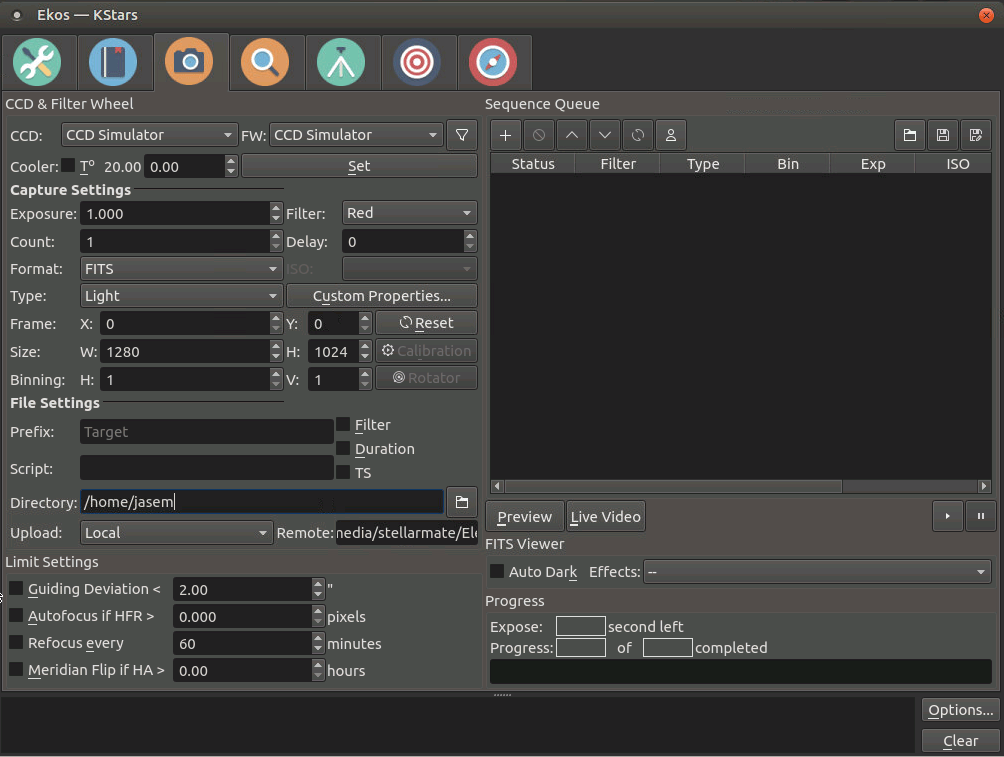
You will see the Remote field getting enabled for editing. Simple paste the location URL here and start the capture process to have your images saved to the external USB disk.
Cannot connect to DSLR camera?
The following is a list of checks you need to verify before contacting support regarding DSLR connectivity issues:
- Make sure the camera battery is full.
- Make sure there is enough space on your SD card.
- Make sure the camera is set to Bulb/Manual mode. In some models you need to rotate the dial first to Manual then change the setttings to make it Bulb.
- Turn off any power-saving features in the camera that might be making the camera go to sleep mode without your knowledge. Some cameras support inactivity timer, try to set it to 10 or 15 minutes to be on the safe side.
- Try a different USB cable.
- Try plugging the camera to a different USB port on StellarMate.
If none of the above works out, please submit a support ticket with details on your setup.
Can I add a Real-Time Clock?
StellarMate Gadget already ships with RTC clock configured and ready to go. For users of StellarMate OS running on their RPI3/RPI3B+, you can purchase a DS3231 module and install it. There is no need to perform any additional software configuration as StellarMate OS supports DS3231 natively.
How to access images on StellarMate from PC/Mac?
If you captured images and saved them to StellarMate, then they should be available by default under /home/stellarmate/Pictures. To access the images over the network, there are two options:
- On Windows, click on the Network icon in the left pane of File Explorer as illustrated below.
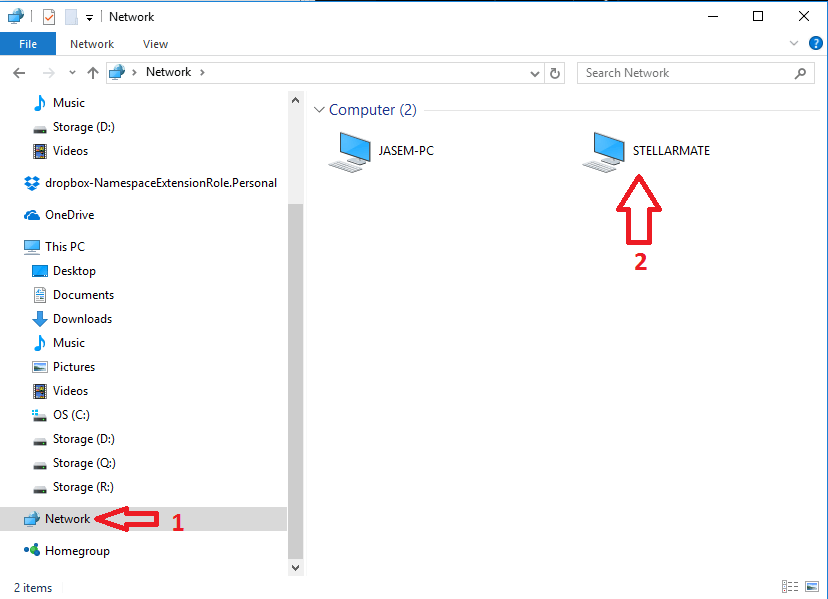
If you do not see the StellarMate network share, please map the network drive as shown in this video:
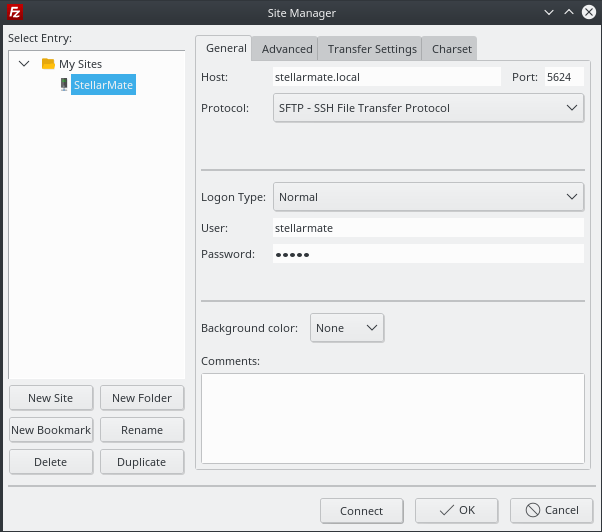
- On Linux & MacOS: Use FileZilla to connect to StellarMate via Secure FTP (sftp) using your username (stellarmate) and password (smate). Remember to set port to 5624.
How can I connect to StellarMate directly via Ethernet cable?
It is possible to connect to StellarMate directly without going via a router. Simply connect an ethernet cable from your PC/Mac to StellarMate. There is no need to use a crossover cable, any regular Ethernet cable would do. You can access StellarMate as you would normally do via the address http://stellarmate.local
Using the App or StellarMate Dashboard, you can set StellarMate to Direct Ethernet mode. In this mode, StellarMate IP address is set to 192.168.100.1
Using your OS network configuration tool, Change your Network Adapter IP settings to the following:
- IP Address: 192.168.100.2
- Subnet Mask: 255.255.255.0
- Gateway: 192.168.100.1
- DNS: 192.168.100.1
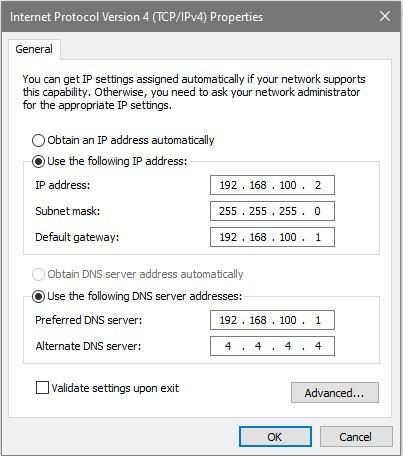
After applying the settings, you can access StellarMate either via http://stellarmate.local or via http://192.168.100.1 address.
Can I use my ASCOM drivers and software with StellarMate?
No.
StellarMate is based on Open Astronomy Instrumentation Protocol (INDI) and does not use ASCOM. INDI enables native remote control of your equipment and numerous devices are supported by manufacturers today. Ekos is the officially supported client, but you can also use over 15+ clients on across many operating systems.
How can I save my images on StellarMate?
StellarMate ships with 32GB MicroSD card. Images are saved by default to the internal SD card. It is possible to change the default Pictures directory (/home/stellarmate/Pictures) to a different location using either StellarMate Tools or StellarMate App.
StellarMate Tools via VNC

Once the Pictures Directory is set, KStars and Network Storage is updated to the new directory. StellarMate requires a restart for this to take effect.
StellarMate App
From StellarMate App Capture Module, toggle File Settings to change the default Pictures directory or set it to an external storage.
KStars on PC/Mac
If you are using Ekos on PC/Mac, then you need to set Upload mode to Local and then set the Remote Directory to /home/stellarmate/Pictures as illustrated below:
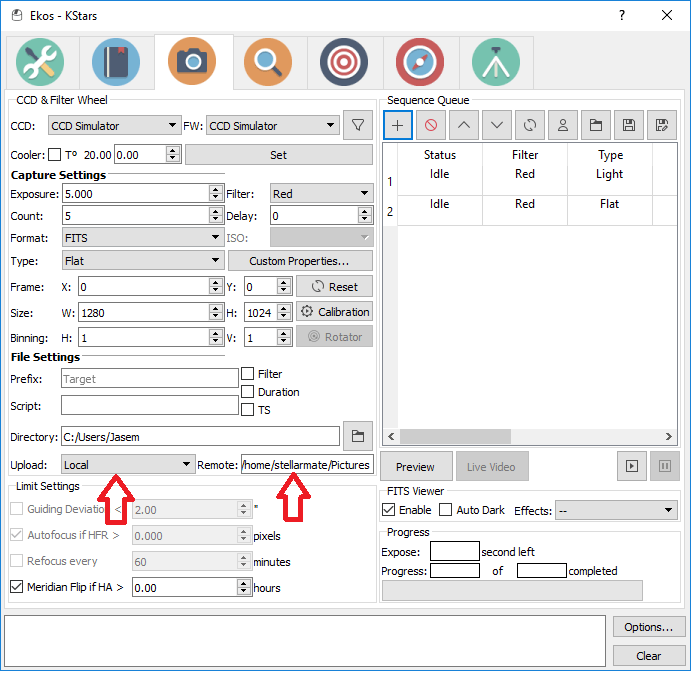
2. If you are using Ekos directly on StellarMate, simply set the Directory field in the capture module to /home/stellarmate/Pictures. The Upload mode should remain as Client.
/home/stellarmate/Pictures is case sensitive. Make sure not to set it by mistake to /home/stellarmate/pictures
Can I use SSH to login remotely? How about SFTP?
Yes. Stellarmate does not use the default SSH port. Use port 5624 to login to StellarMate using your username and password.
ssh -p 5624
The same port should be used for SFTP (e.g. in FileZilla). You can perform remote update using the following command:
sudo apt-get update && sudo apt-get -y dist-upgrade
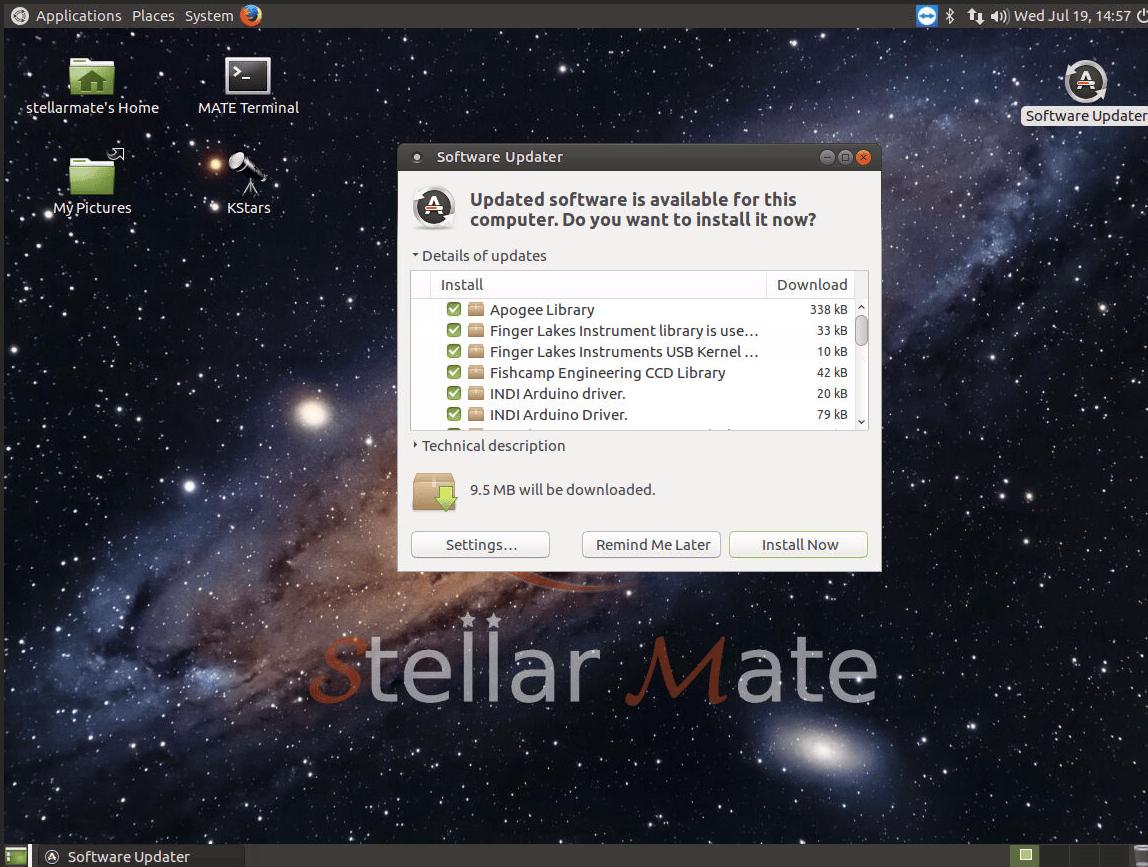
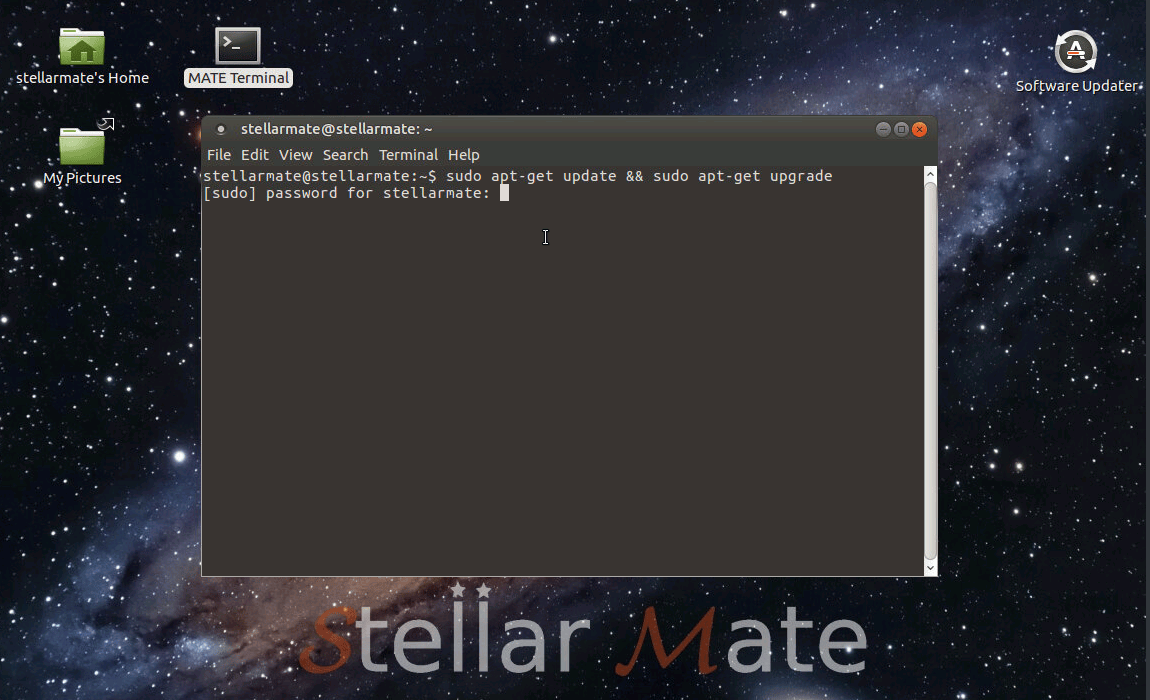
How do I update StellarMate?
Use Web-Based VNC Viewer or any VNC Viewer to access StellarMate. Simply double click the Software Updater icon to fetch updates. If there are any available updates, a window shall appear with the required upgrades. Click Install to download and install them. It is recommended to restart the unit after installation updates.
If for any reason you are having problems with the GUI Software Updater, you can directly write a command to start update process. Double click the Mate Terminal icon and a terminal window shall be opened. Type in the following command and press enter:
sudo apt-get update && sudo apt-get -y upgrade
How can I use a Joystick to control my mount?
Please follow instrucitons in Controlling your Mount with Joystick tutorial.