


Ethernet Connection
You must first complete the First Time Setup guide before proceeding with this tutorial.
By default, StellarMate operates in HotSpot mode. Even if configured for WiFi connection or LAN, StellarMate always switches back to HotSpot mode when the other connection mode become unavailable. This is to enable you to always access the device regardless of network avalibility. If StellarMate is connected over Ethernet, the HotSpot is NOT started. It is only started when all connections are unavailable.
There are two methods for Ethernet connections:
- Direct Ethernet Connection Between StellarMate and your PC/Laptop: This can be useful in the field if you want a fast response time, at the expense of more cables. Ethernet is always faster and more reliable than WiFi connections (at the moment at least). When using Direct Connection, the HotSpot is activated
- LAN Ethernet Connection: Connect Ethernet to Router/Switch. Your router shall assign an IP address for StellarMate automatically, or you can configure the router to assign StellarMate a permenant IP address.
Direct Ethernet Connection
Follow the Direct Ethernet tutorial to learn how to establish connectio between StellarMate and your PC/Laptop.
LAN Connection
No further setup is required. You can directly access StellarMate via the stellarmate.local address.
Connecting your equipment
StellarMate supports connecting to your equipment via WiFi, Ethernet, Bluetooth, or USB. USB is the primary connection method for most astronomical devices. Make sure all equipment are sufficiently powered and initailized before connecting them to StellarMate. For mounts, most mounts need to be already aligned before you connect them to StellarMate.
To learn more about connecting your equipment to StellarMate, find out more in the detailed equipment connection guide.
Downloading Ekos
Ekos is the official Astrophotography Tool used for StellarMate. It is part of KStars, a popular planetarium application for Windows, MacOS, and Linux.
Download and setup KStars on your system before proceeding forward.
Connecting from Ekos
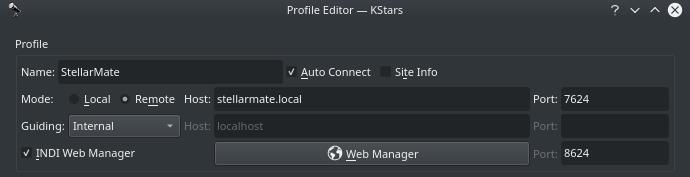
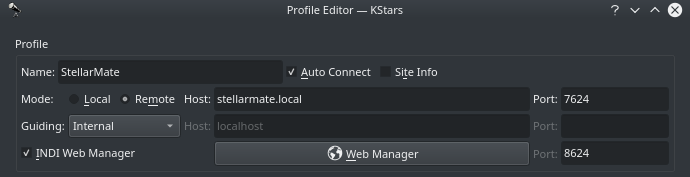
When you use Ekos on your PC/Mac, set the profile to Remote and set the Address to stellarmate.local
Make sure INDI Web Manager checkbox is checked.
It is recommended to use the Ekos Profile Wizard to setup your first profile.The wizard automatically starts up the first time you fire Ekos in KStars. To start it again, please the wizard icon in Ekos summary screen.

Click Next to proceed to the next screen
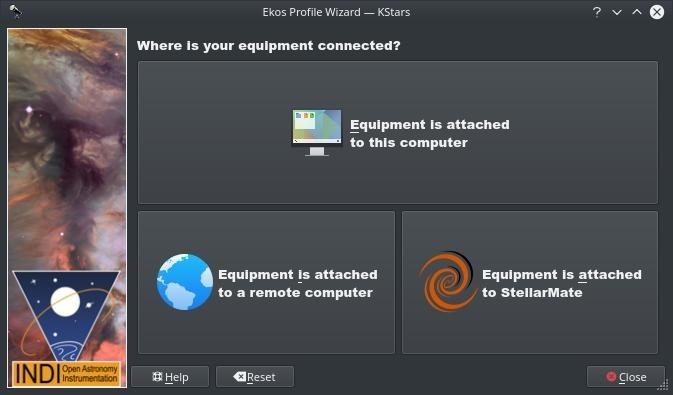 In Here you need to select if your equipment is select to StellarMate or elsewhere:
- If you are running Ekos within StellarMate OS, then select Equipment is attached to This Computer.
- If you are running Ekos on a PC/Mac, then select Equipment is attached to StellarMate.
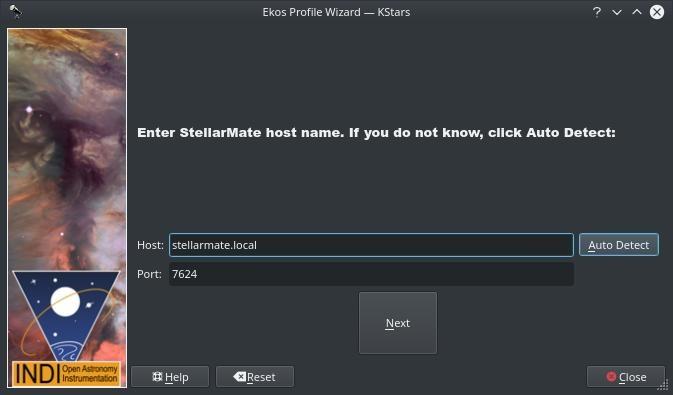
In case you selected #2 above, you have a choice to specify the StellarMate Address & Port. These settings are for advance usage of StellarMate, so just click Next.
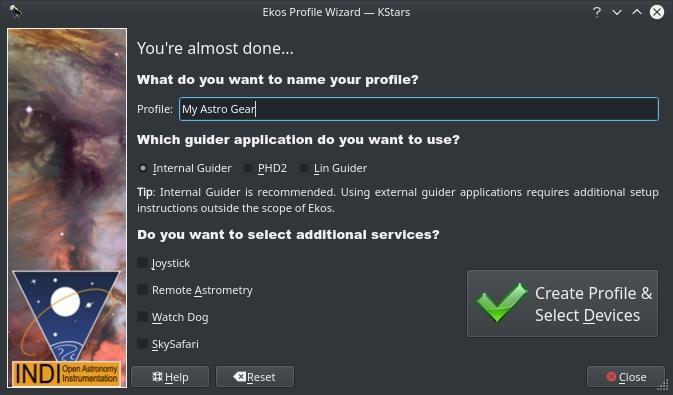
Next select your equipment profile name and any additional services you want to run then proceed to create the profile.
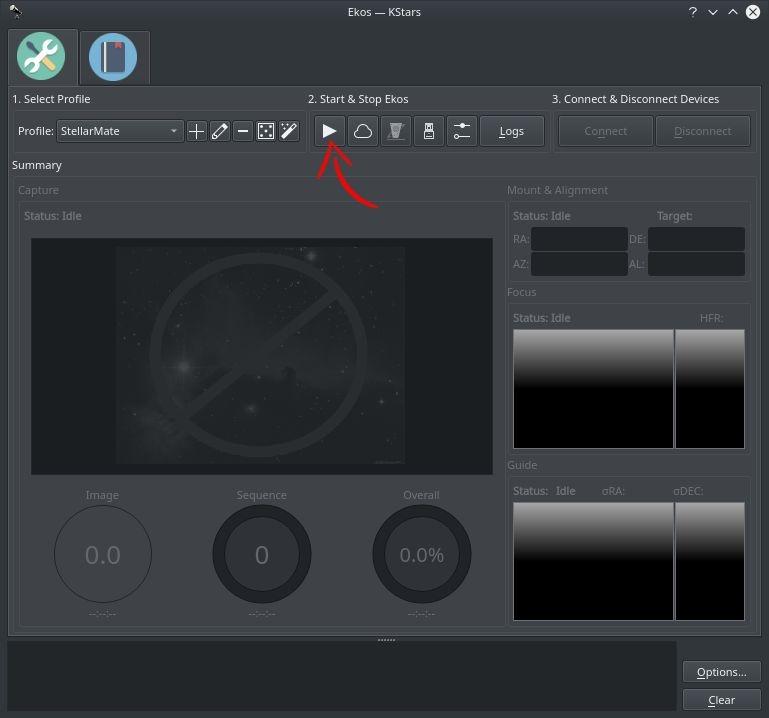
To connect to your equipment and start using Ekos, simply click the Start button as illustrated above.