Pegasus Ultimate Power Box
Features
INDI Pegasus UPB driver provides complete control over the Pegasus power box including:
- Power Port Control
- Power Monitoring
- USB Hub Control
- Focus Control
- Dew Control
- Environment Monitoring
Please make sure the power box is updated to the latest firmware before using it with the INDI driver.
Connect
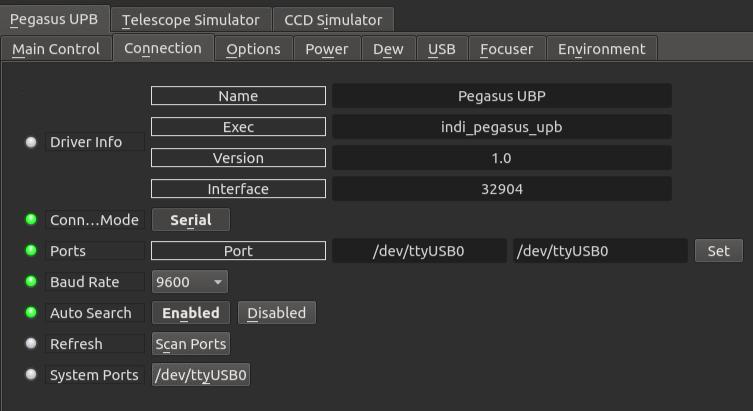
Connect UPB to the PC/StellarMate via the USB cable. The operating system assigns a serial port to the device (e.g. /dev/ttyUSB0). If the device cannot establish connection to the default port, it starts a process to scan the entire systems for additional serial ports to connect to.
Operation
Main Control
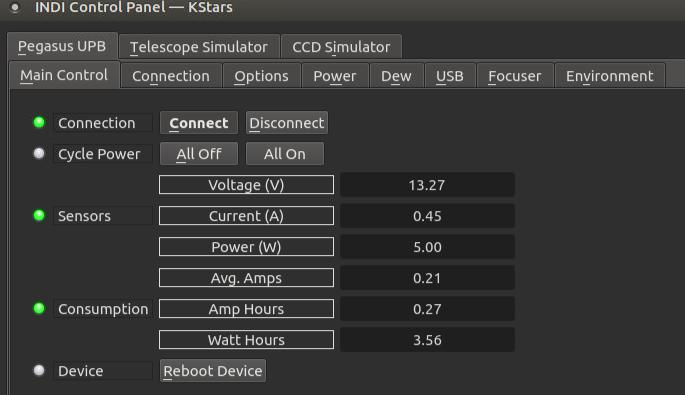
To establish connection to Pegasus UPB, press the Connect button.
Once connection is established, addiotnal tabs for the different control categories are created accordingly.
The main control provides displays for the voltage, current, and power sensors. The average consumption of current and power is also displayed. You can turn on or off all the ports at once if desired. Finally, you can reboot the device.
Options
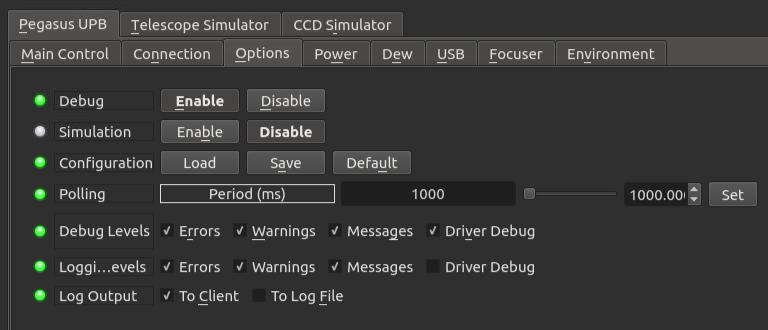
The INDI generic Options tab provides controls for debugging and logging in addition to polling period. It is best not to change any setting here
Power
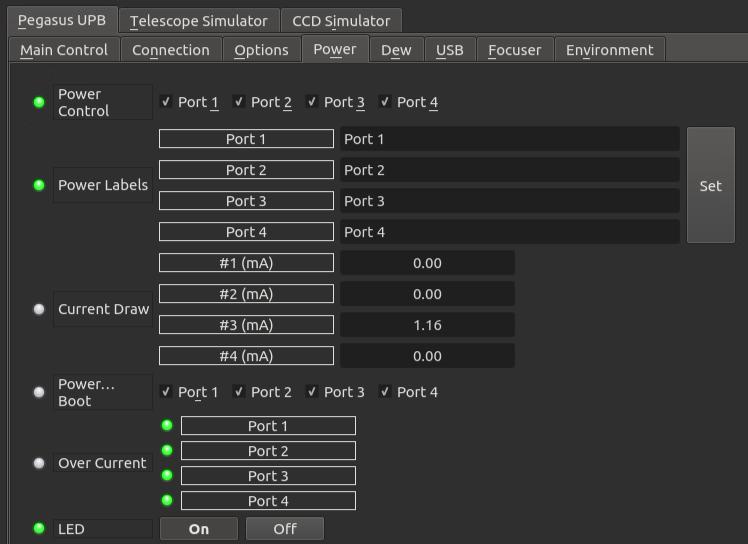
The power tab provides all controls to manage the four 12v power ports on the UPB. The first property controls which ports are on or off. To change the name of the ports from the generic Port 1, Port 2..etc to more meaningful names of the actual devices (e.g. camera), edit the Power Labels to set the label of each port. Once set, you need to restart the driver to see the changes.
The Power On Boot property sets which ports are powered when the device boots up. By default, all the ports are powered.
In case of an over-current, the LEDs for each port in the Over Current property will turn from green to red to indicate a problem
To turn on or off the small LED on the UPB box, click on the LED property settings.
Dew
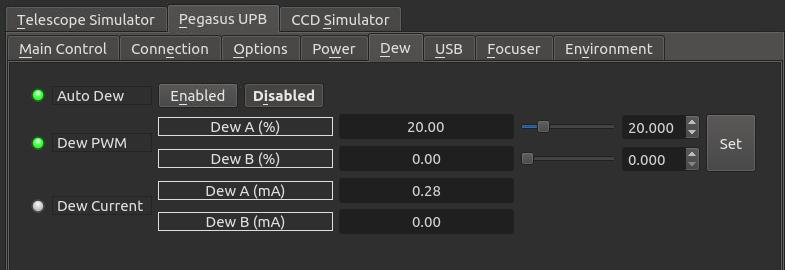
UPB can control up to two Dew heaters using Pulse-Width-Modulation (0 to 100%). Once PWM is set, the current drew should also reflect how much current each dew is consuming.
To activate the Dew heating automatically based on the measured Dew point, turn it on from the Auto Dew property.
USB
Enable or disable the USB hub. This can only control ports 1-5 since port 6 is always on.
Focuser
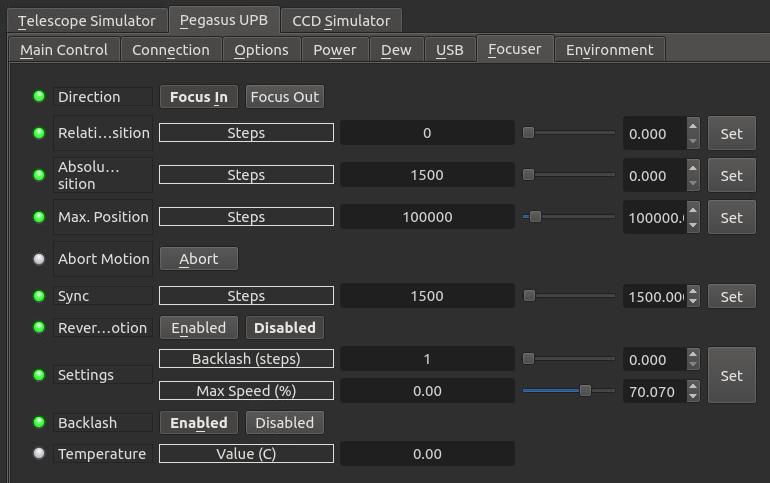
If a focuser is connected, it can be controlled directly from the focuser tab.
To move the focuser specific number of steps inward or outward, select the Direction and then set the Relative Position property.
For absolute position, enter the desired position in the Absolute Position property. The postition must be within the maximum position as can be configured by the Max. Position property.
Sync is used to set the current focuser position to any arbitrary value.
The focuser settings include the following:
- Direction Reverse
- Backlash (in steps)
- Backlash Enable and Disable
- Max Focuser Speed (in %)
Environment
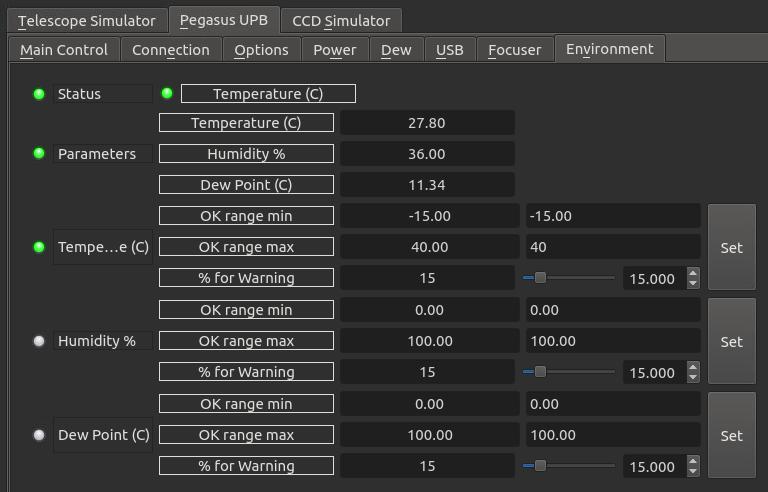
The weather information, measured and calculated, is displayed in this tab. Three parameters are listed:
- Temperature (C)
- Humidity (%)
- Dew Point (C)
The temperature parameter is considered the Critical parameter and if the range is out of normal range, the overall weather status indicator shall reflect that.
Each environment variable range is controlled by the following:
- OK range Min: This is the Minimum range at which the status of the property is considered OK (Green LED). Anything below this would be Alert (Red LED)
- OK range Max: This is the Maximum range at which the status of the property is considered OK (Green LED). Anything above this would be Alert (Red LED)
- % for warning: At what percentage of the OK range should a warning indicator activates?
For example, if the range as illustrated above is Min: -15 and Max: 40, then the warning range is from Min: -15 + -15*0.15 = -12.75C
Similary, the warning zone max: 40 - 40*.15 = 34C. If the temperature is 27.80 then it is within the OK range and not within the Warning zone. Once the temperature reaches 34C, the temperature indicates turns yellow to Warning. If it continues climbing, the state remains Warning unitl it hits and exceeds 40C in which case the state become Alert.
Issues
There are no known bugs for this driver. If you found a bug, please report it at INDI'


