7. Remote Control
StellarMate provides multiple methods to access the system locally or remotely:
Locally: You can connect Keyboard, Mouse, and HDMI to access StellarMate directly since it is a mini computer.
Local WiFi: Connect to StellarMate over WiFI Hotspot or Station mode via Remote KStars, StellarMate App, Rustdesk, or VNC.
Internet: Use Remote KStars, StellarMate App (requires ports 3000 and 8624 to be open), Ekoslive, or Rustdesk.
7.1. VNC
StellarMate is shipped with a VNC Server. This enables access to the whole StellarMate desktop remotely. To connect to VNC, you can either use a Desktop/Mobile VNC Client, or simply via any browser. The web VNC address is: http://stellarmate.local:6080 If StellarMate is inaccessible via its host name, you can replace stellarmate.local with the IP address (e.g. 192.168.1.2). You can find StellarMate IP and hostname in the StellarMate App. Any VNC client (e.g. RealVNC) can be used to access StellarMate over the local network. Once you access StellarMate, you can use it like any full-fledged computer. The default username is stellarmate and default password is smate.
7.2. Rustdesk
StellarMate is shipped with Rustdesk Remote Control software. RustDesk is a free, open-source remote desktop tool that offers fast, secure, and user-friendly remote access to computers across various platforms. It prioritizes user privacy with end-to-end encryption and is suitable for both casual and professional users. The difference between Rustdesk and VNC is that Rustdesk can be used over the internet without having to open any ports on the router. You can use Rustdesk to access StellarMate desktop remotely over the internet. In the StellarMate App, you can toggle Rustdesk service and copy the Rustdesk ID.
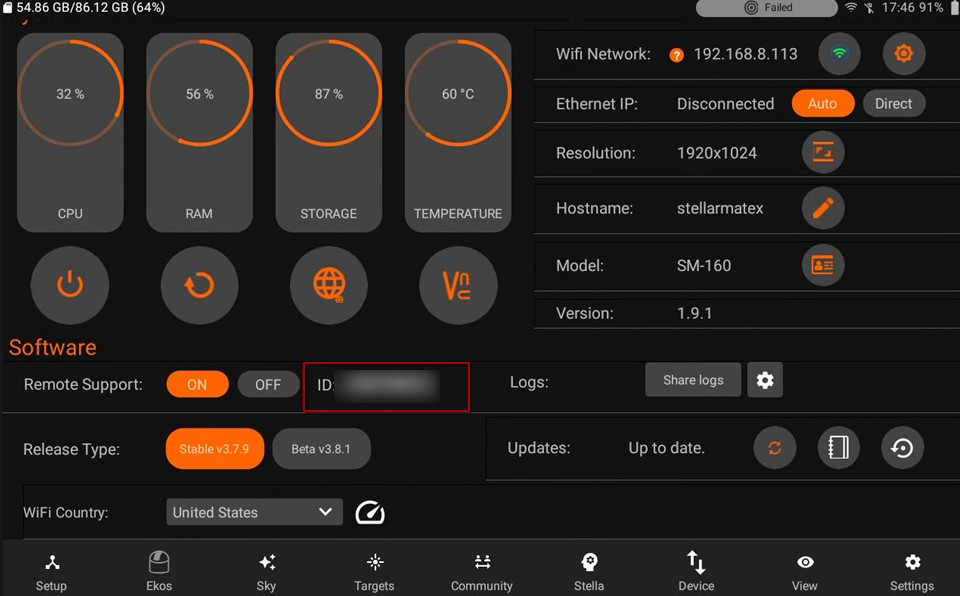
Download the Rustdesk client on MacOS, Windows, Android, or Linux and use the Rustdesk ID and password to remotely access your unit. By default, the password is stellar@Mate123! It is highly recommended to change the Rustdesk password after enabling the service.
7.3. SM App
StellarMate App communicates with StellarMate controllers over WiFi. By default, StellarMate Controller creates its own Access Point (Hotspot) that you can connect to by joining your Phone/Tablet to the StellarMate hotspot and then scanning for StellarMate devices on the network.
To configure StellarMate network settings, use StellarMate App Device tab to configure WiFi, Frequency, Channel, and Direct Ethernet.
7.3.1. LAN
StellarMate can be connected to your local network (LAN) either wirelessly or via wired Ethernet connection. This is done either via configuring StellarMate Controller to run in Station Mode (i.e. Home WiFi) or via connecting an Ethernet cable to the local network. Wired connections are highly recommended as they offer the best reliability and speed over wireless connections. Once connected to the local network, use StellarMate App to RESCAN for StellarMate devices on the network. Always make sure that your Phone/Tablet is connected to the same network where StellarMate resides.
7.3.2. WAN
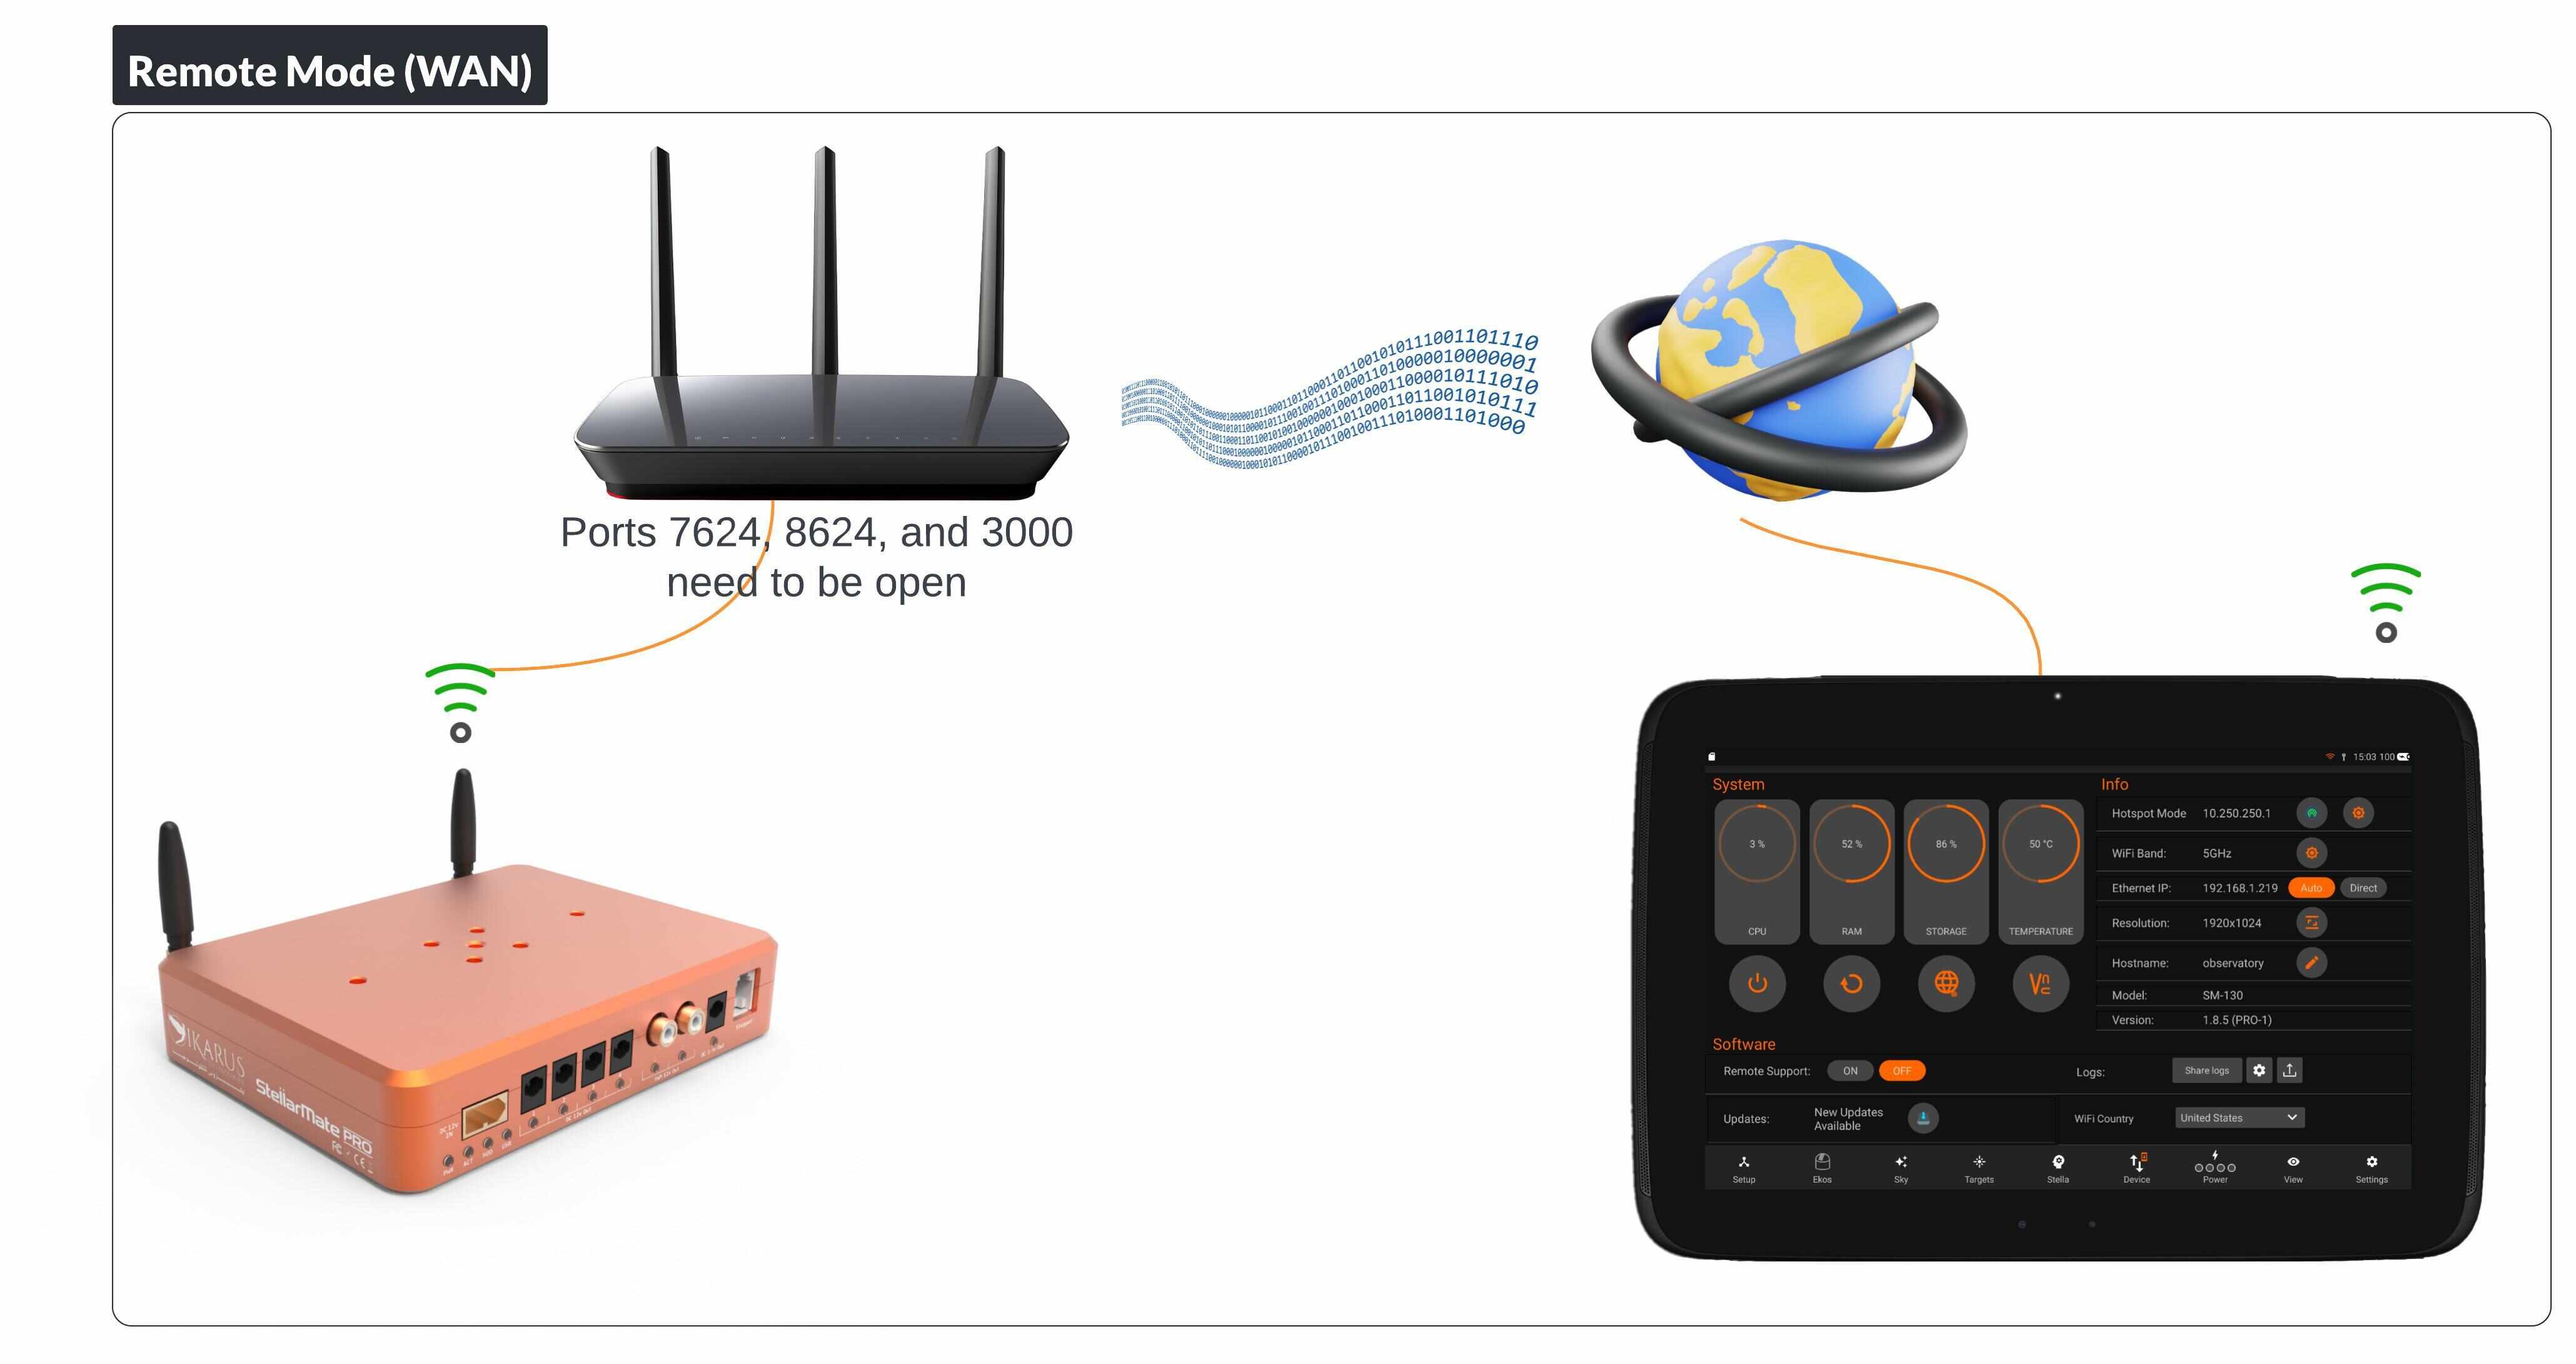
If connecting over WAN, ports 7624 and 8624 must be opened over the remote router and forwarded to the StellarMate controller running KStars.
7.4. KStars
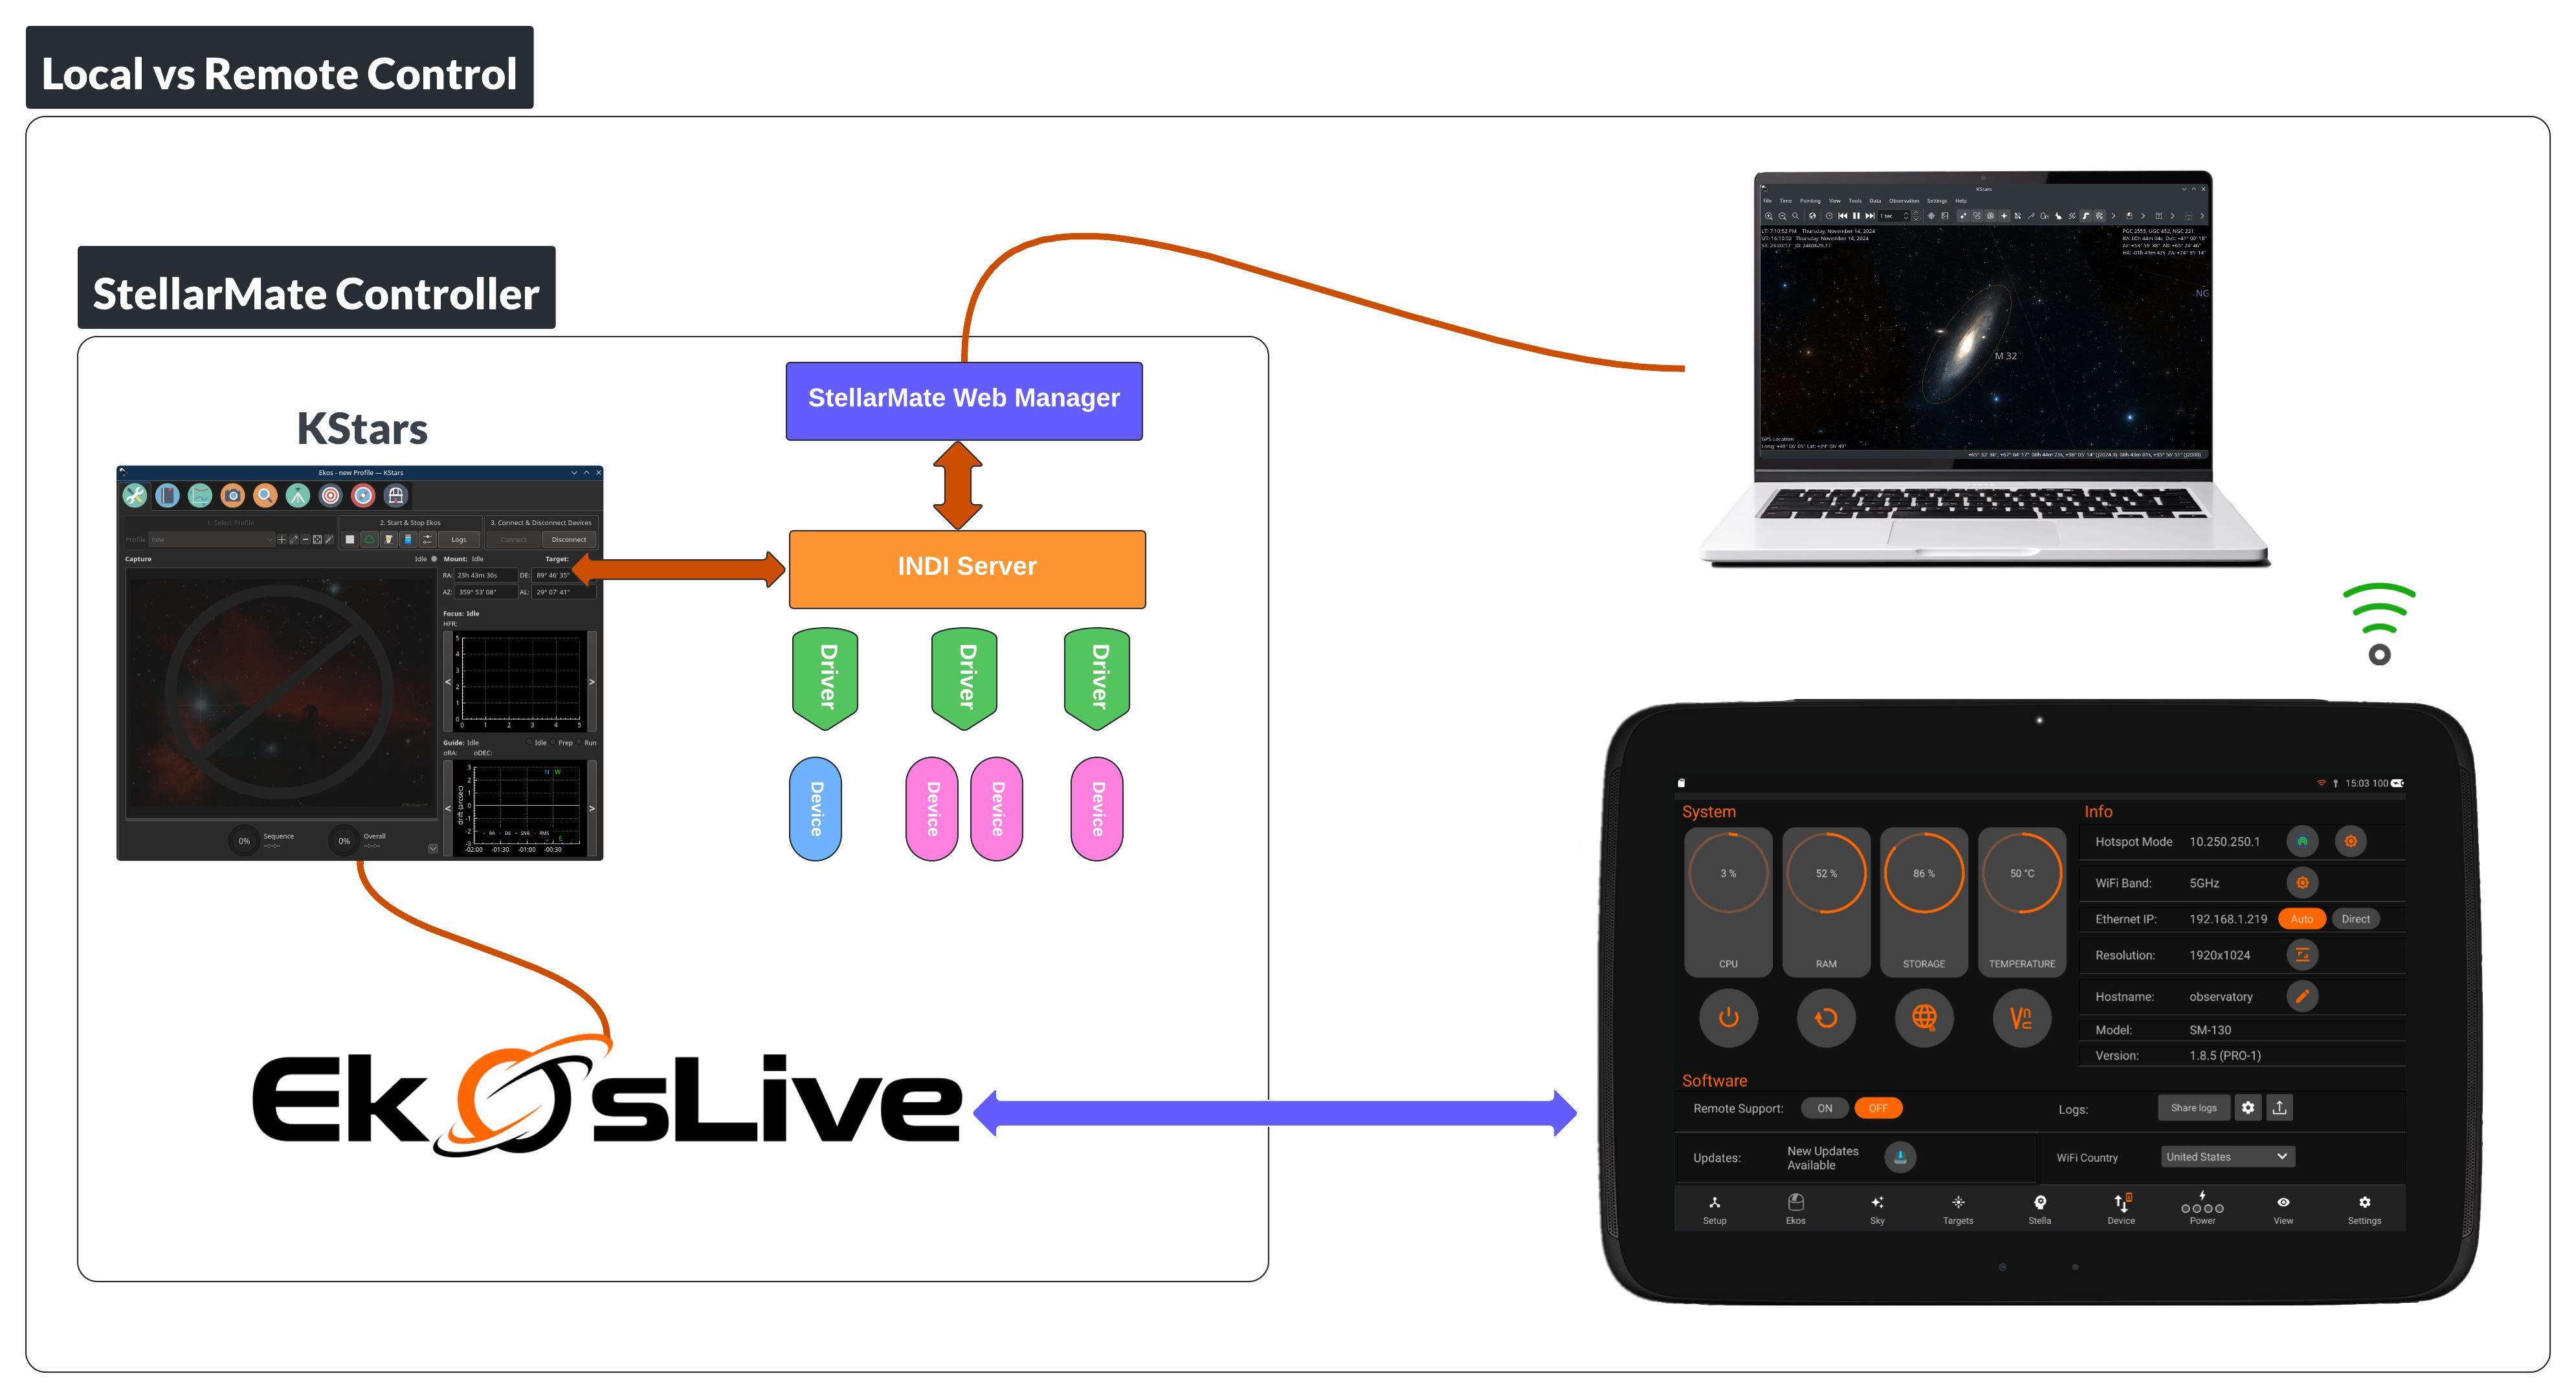
KStars is free, open source, cross-platform Astronomy Software. It provides an accurate graphical simulation of the night sky, from any location on Earth, at any date and time. Bundled with KStars is Ekos astrophotography suite, a complete astrophotography solution that can control and automate all your atronomy equipment. The topology of StellarMate App, KStars, Ekos, and INDI can be simplified to the following points:
Astronomy devices are connected to StellarMate via USB or Network (WiFi/Ethernet).
Each device is controlled by a corresponding INDI driver. An INDI driver provides an abstraction layer so that clients like Ekos can issue commands regardless of the underlying implementation of each unique device.
INDI drivers can be managed directly in KStars by starting and stopping INDI server, or via StellarMate Web Manager that provides an API to remotely start and shutdown INDI server.
An INDI server is a hub where all drivers communicate with each other and the clients.
When using Ekos inside StellarMate directly (HDMI, VNC, or SM App via EkosLive), Ekos completely manages the INDI server.
EkosLive is a middleware that allows external applications to talk with Ekos over websockets.
When using Ekos on a remote PC/Mac, it can control the equipment by bypassing KStars completely and launching the INDI server remotely via the StellarMate Web Manager.
EkosLive not only provides communication between StellarMate App and Ekos, but it also connects KStars to the online ekoslive.com portal where you can use a web-based interface similar to StellarMate App to control Ekos remotely.
KStars can be connected to StellarMate Controller in a number of ways
1. Directly in StellarMate OS Use VNC, Rustdesk, or HDMI to directly operate KStars inside StellarMate. Using KStars inside StellarMate gives the fastest results since images are saved immediately on the local storage.
2. Remote KStars Since KStars communicate with the INDI server using TCP/IP, KStars can be used to run devices on any StellarMate Controller remotely.
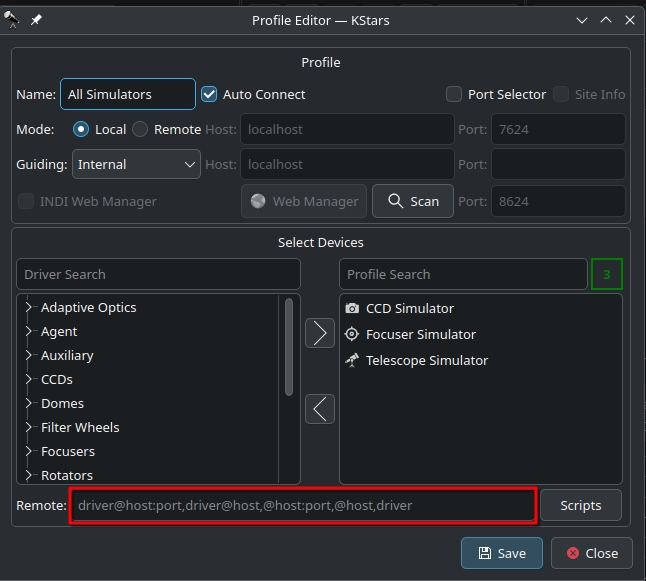
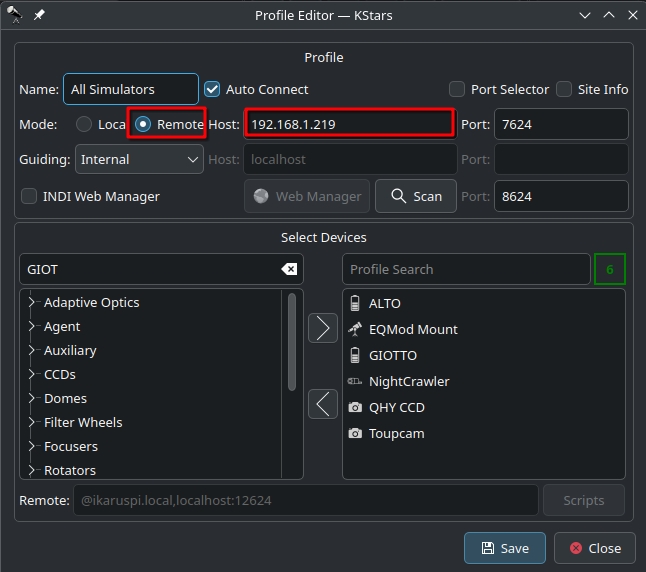
- When configuring KStars for remote connection:
Change mode to Remote
Enter remote StellarMate Controller IP address or host name.
Enable StellarMate Web Manager
SM Pro: Add to remote drivers @localhost:12624
7.4.1. LAN
When connecting over LAN, ensure to configure your equipment profile in Remote mode. Put the StellarMate unit IP address or hostname (e.g. stellarmate.local). Make sure that the INDI Web Manager checkbox is checked.
7.4.2. WAN
If connecting over WAN, ports 7624 and 8624 must be opened over the remote router and forwarded to the StellarMate controller running KStars.
7.5. Ekoslive
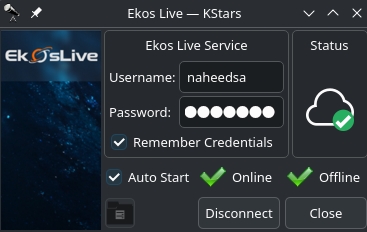
EkosLive is an online platform to access your StellarMate remotely. It offers simplified web-based controls for Ekos along with advanced features such as Stella AI, Cloud Storage, and Observatory Management. EkosLive Basic subscription is completely free for all StellarMate users.
Once StellarMate is configured via StellarMate App, connect StellarMate to the unit and head over to EkosLive to access it remotely. You can check To monitor whether EkosLive is successfully connected, look for the connection status icons. These icons are represented by cross icons that indicate whether the connection is established or not. Ekoslive is connected successfully.
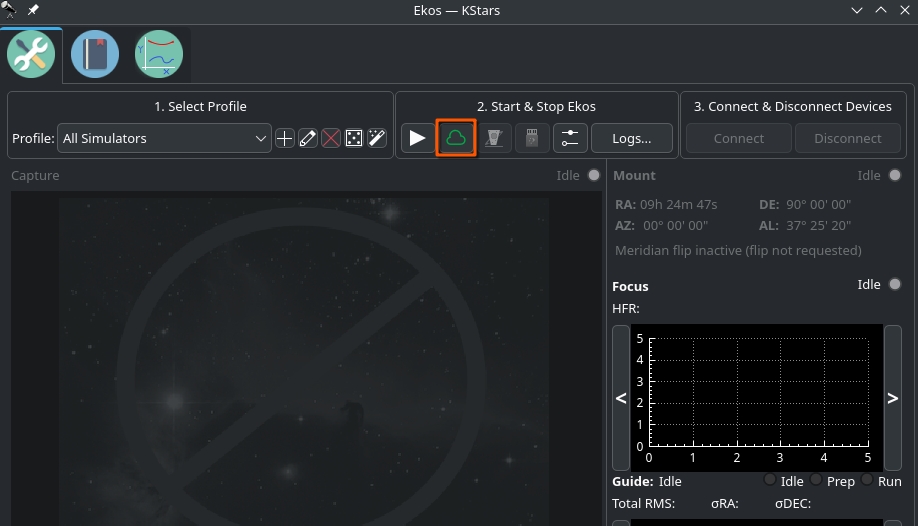
To manage the connection settings, click on the configuration icon. This icon allows you to toggle between different connection options and configure your settings as necessary.
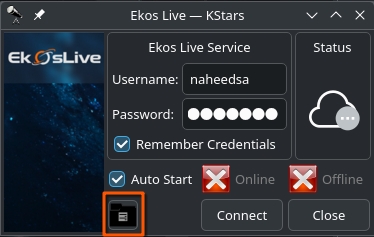
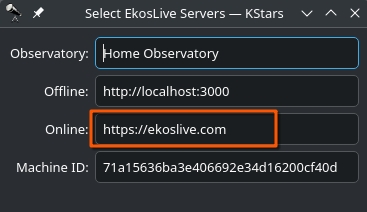
Within the configuration settings, you will find a field where you can insert the URL for EkosLive Online. Make sure to provide the correct URL that points to your EkosLive instance.
Once the URL has been entered, press the Connect button. Upon successful connection, both EkosLive Online and EkosLive Offline will establish a connection with KStars. This will enable the synchronization between the two platforms.
7.6. Connecting from Ekos via Ethernet/WiFi
When you use Ekos on your PC/Mac, set the profile to Remote and set the Address to stellarmate.local.
Make sure INDI Web Manager checkbox is checked.
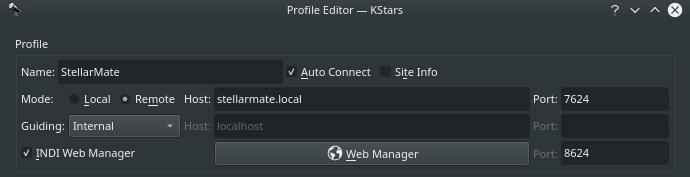
It is recommended to use the Ekos Profile Wizard to set up your first profile. The wizard automatically starts up the first time you fire Ekos in KStars. To start it again, please click on the wizard icon in Ekos summary screen.
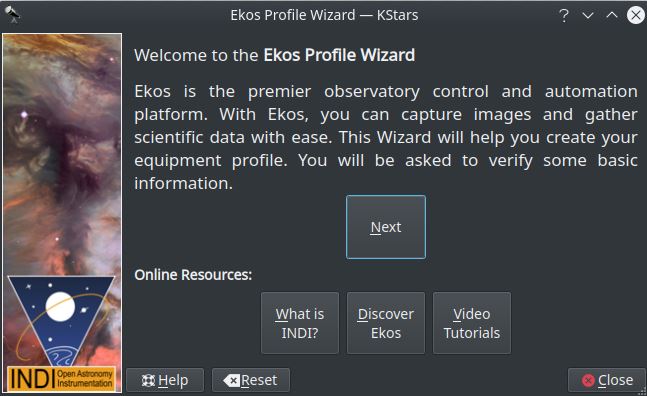
Click Next to proceed to the next screen.
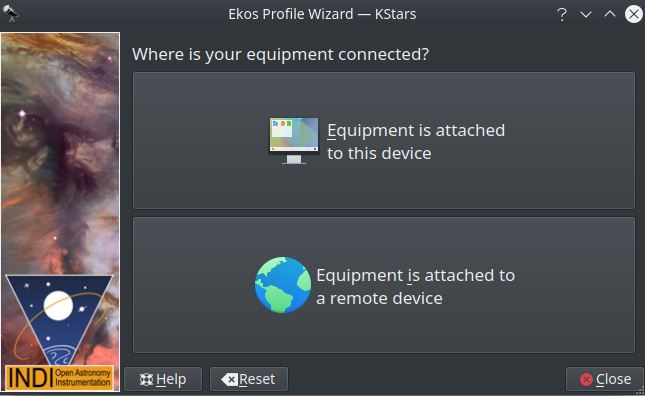
In here you need to select if your equipment is attached to StellarMate or elsewhere:
If you are running Ekos within StellarMate OS, then select Equipment is attached to this device.
If you are running Ekos on a PC/Mac, then select Equipment is attached to a remote device.
Next, select your equipment profile name and any additional services you want to run then proceed to create the profile.
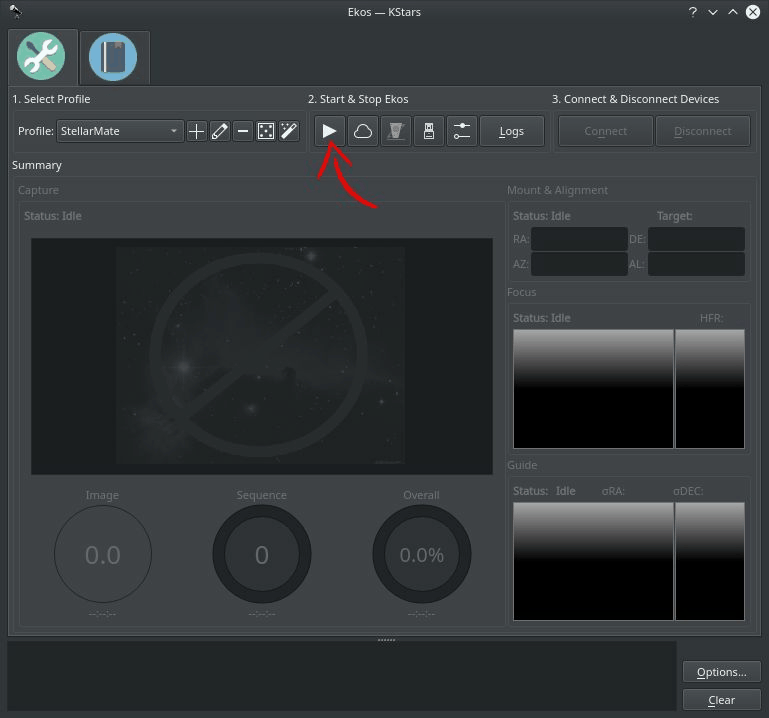
To connect to your equipment and start using Ekos, simply click the Start button as illustrated above.